You should be seeing tons of C or C++ codes where you see #include "foo.h" at the top. You look at these #include preprocessor directives, and you probably never asked yourself, why couldn’t you use #include "foo.c" or #include "bar.cpp"?
Well, you’re in luck, because ever since Visual Studio 2008, and all the way until Visual Studio 2017, you are able to use #include "foo.c" and / or #include "bar.cpp" in your code.
There are 2 main pros when doing this in your code:
- You reduce the number of files for the Visual C++ compiler to compile. Even if you have the advantageous high grounds where you can do multithreading and batch compiling multiple files, in the end, you still would have reduced the total number of files to compile.
- You can insert your C or CPP source file anywhere in your code. If you have already declared some variables, classes, structs, or anything else, and you want to use them without mixing your code up, by including your code after the declarations, the code can then be able to use them.
That’s all there is to it. That’s not to say these are correct, but they are merely an observation when it comes to understanding the inclusion of a C or CPP file in a source file.
So, how do you do this? It’s simple.
We start off with a practice project. First, let’s create 3 files, 2 source files and 1 header file. I’ll be naming them as foo.cpp, bar.cpp, and bar.h, but you can name it whatever you want.
Let foo.cpp be our main source file that will contain our main() function. Let bar.h and bar.cpp both be supplementary codes that will contain codes such as classes, types, structs, and so on, as long as it’s not the main entry point in our code.
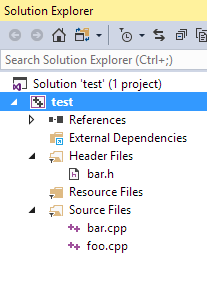
Typically, we would have the following in our Solution Explorer:
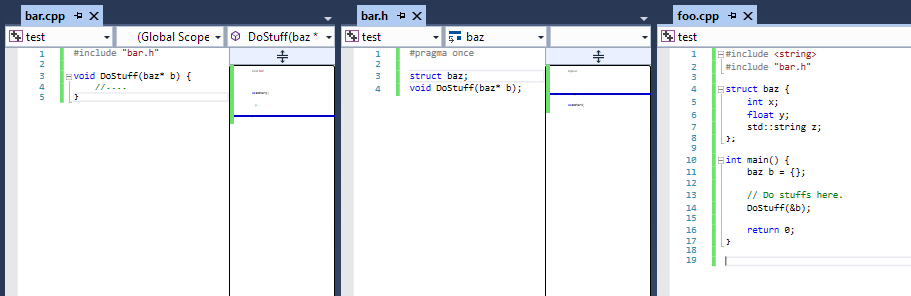
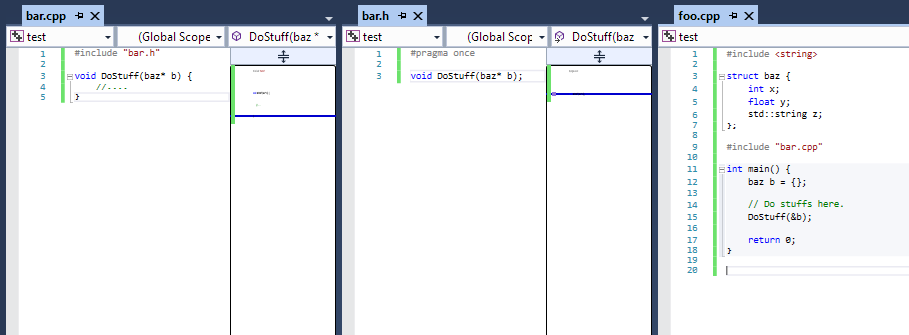
And our code would look something like this (as an example):
Let’s change that by using #include "bar.cpp". The first thing we need to do is to exclude the code files from the build. This means marking certain files from not being included in a list of files for the Visual C++ compiler to compile.
Hold CTRL or SHIFT, and selecting the files you wished to exclude. Then we right click on the multiple files, click on Properties in the context menu at the very bottom, and you should see the following dialog:
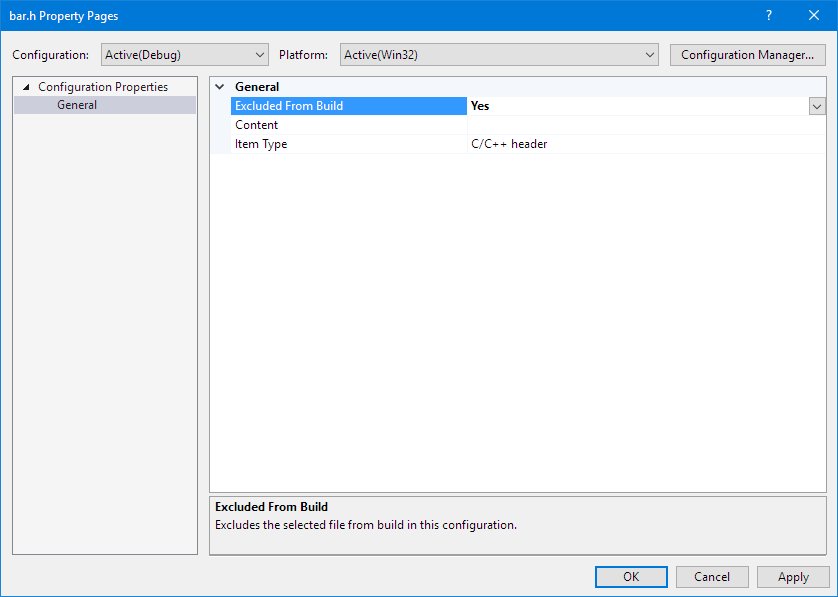
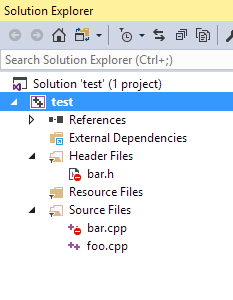
Set the Exclude from Build to Yes, and click OK, that’s all for the compiler. You should see the following afterwards:
We can now go ahead and modify our code, so it looks like the following:
Compiling our code should be successful. That’s how we can use #include to include our C or CPP files when compiling our codes.